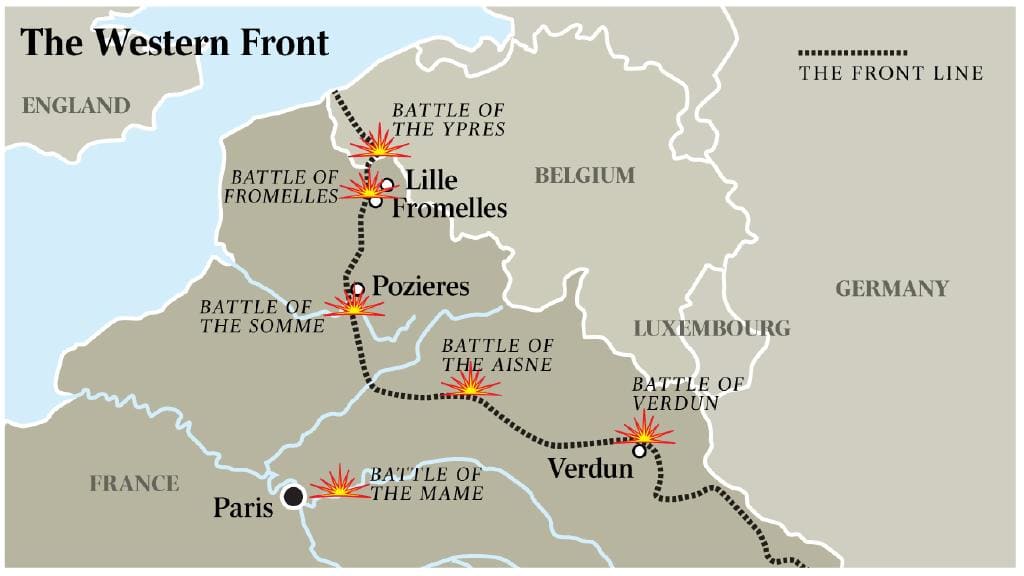
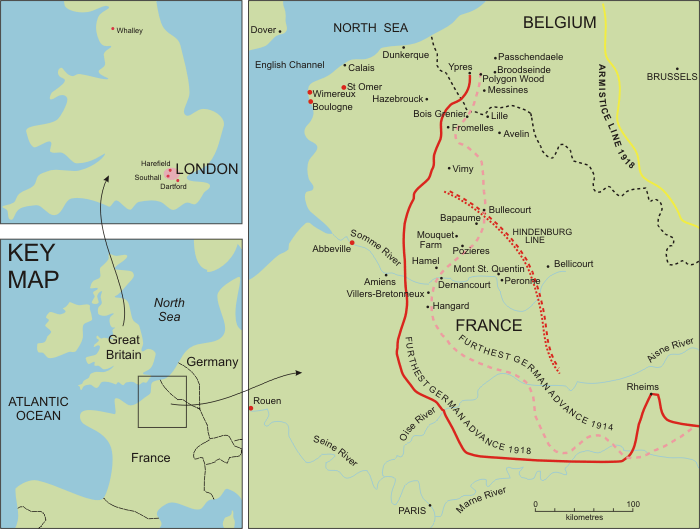
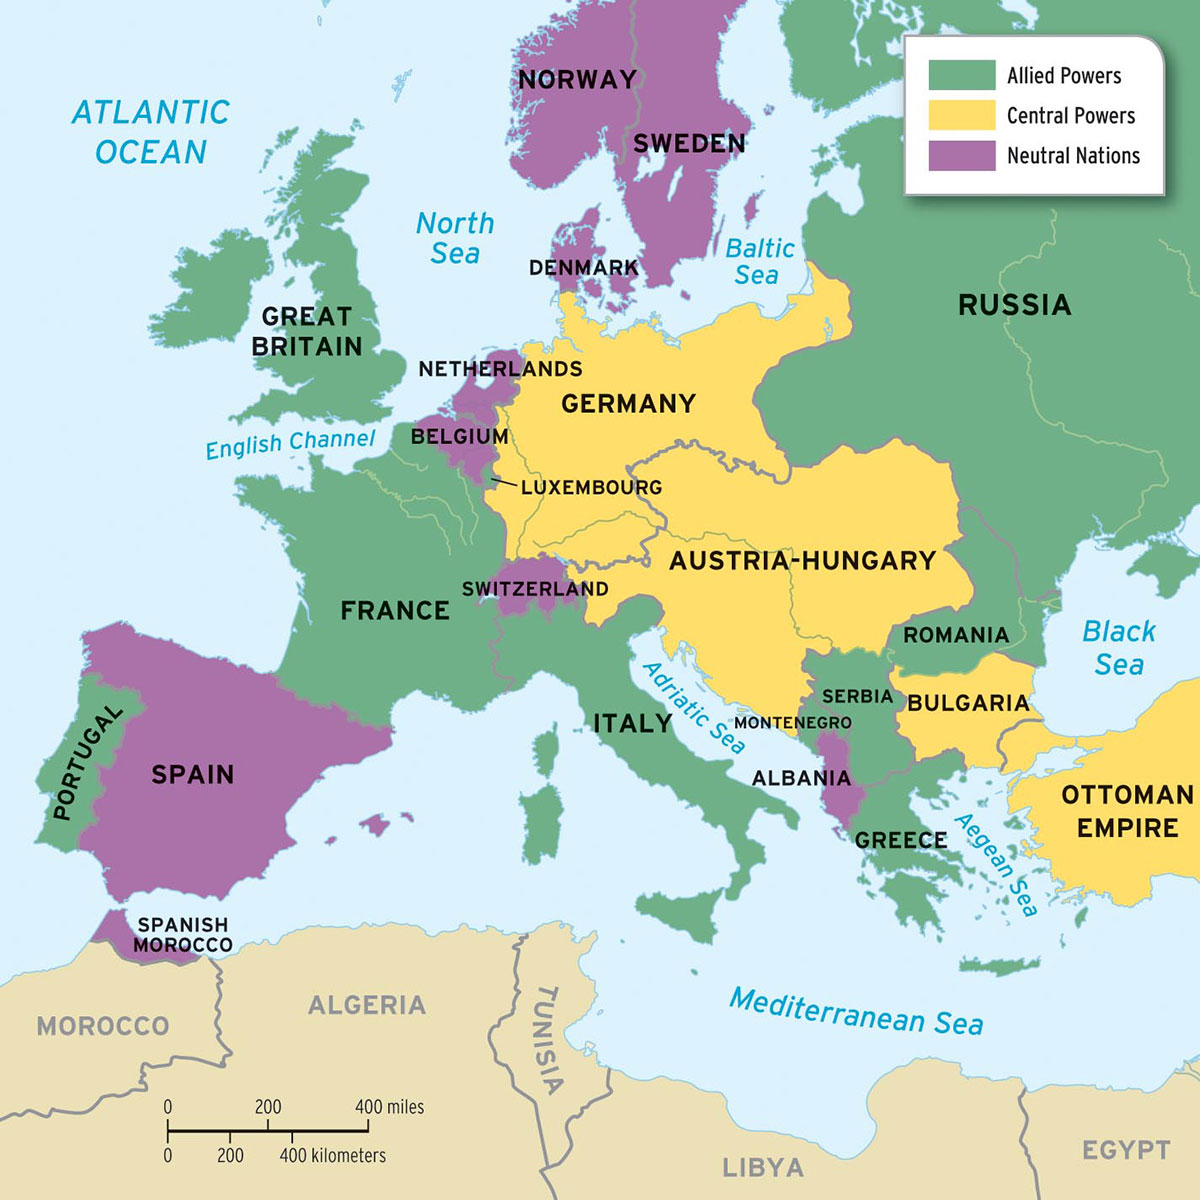
World War I Begins at the dawn of the 20th century, few anticipated a global war, but what came to be known as the Great War began on June 28, 1914, with the assassinations of Austrian Archduke Franz Ferdinand and his wife, Sophie, while they were visiting Sarajevo, Bosnia, a country recently annexed into the Austrian Empire. Many Bosnians and their Serbian neighbors resented this foreign rule and the Archduke’s visit to Sarajevo provided the opportunity for a small band of Serbian dissidents to strike back. Austria responded to the assassinations by teaming up with its ally, Germany, and declaring war on Serbia. The conflict soon involved Russia, France and Belgium. Fearful of a full-scale world war that would threaten its sea routes to other countries, Great Britain joined the fight against Germany and Austria.
Each country believed the fighting would last only a few months. Nations were categorized either as Central Powers or Allies. Countries that joined the Central Powers, such as Bulgaria and the Ottoman Empire, supported Austria-Hungary and Germany. The Allies were Russia, France, Belgium and Great Britain, but they were later joined by Japan, Romania, China and the United States.
 https://history.delaware.gov/world-war-i/
Each country believed the fighting would last only a few months. Nations were categorized either as Central Powers or Allies. Countries that joined the Central Powers, such as Bulgaria and the Ottoman Empire, supported Austria-Hungary and Germany. The Allies were Russia, France, Belgium and Great Britain, but they were later joined by Japan, Romania, China and the United States.
https://history.delaware.gov/world-war-i/No Man’s Land: Trench
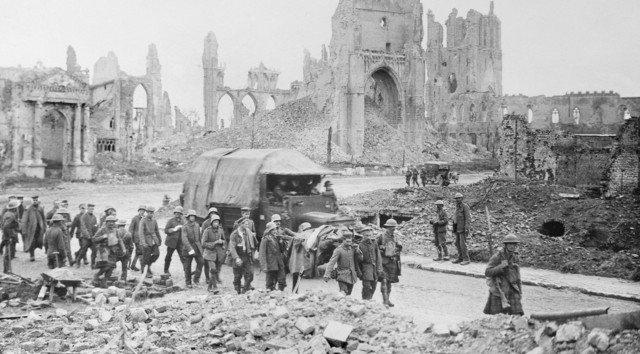
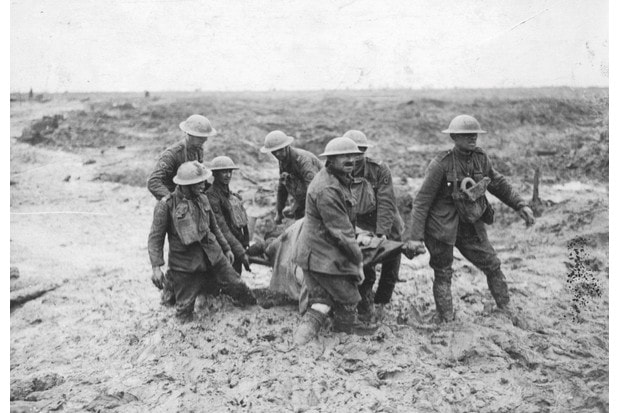
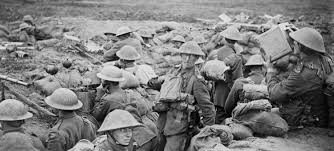
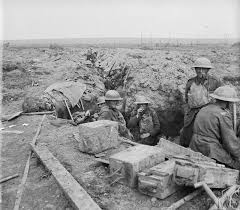
During World War I, trench warfare was a defensive military tactic used extensively by both sides, allowing soldiers some protection from enemy fire but also hindering troops from readily advancing and thus prolonging the war. Trench warfare was the major combat tactic in France and Belgium. Trenches were often dug up to 12 feet deep and stretched for miles. For stability, some trenches included wooden beams and/or sandbags. Even during lulls in the fighting, death occurred almost daily in the trenches due to a sniper’s bullet or the unsanitary living conditions which resulted in many diseases such as dysentery, typhus and cholera. Other diseases caused by the poor conditions were trench mouth and trench foot*.
*Trench mouth was an infection of the mouth due to overgrowth of certain oral bacteria. The condition was made worse by poor oral hygiene, smoking, malnutrition and psychological stress. To prevent trench foot, a fungal disease caused by exposure to wet and cold, soldiers frequently added wooden planks in the trenches to keep from having to stand in water.
Barbed wire and explosive mines—as well as bullets and grenades—were essential weapons used to hinder infantry advances across “No Man’s Land,” the bleak landscape between the trenches of the opposing sides.
https://history.delaware.gov/world-war-i/
New offensive weapons were implemented during the war including tanks and poison gases*.
*Tanks, armored against artillery fire, were capable of rolling over barbed wire as well as crossing treacherous terrain.
Chlorine was one of the poisonous gases used in World War I. It was damaging to the eyes, nose, throat and lungs, and produced symptoms ranging from irritation to blindness and death.)
In 1915, the Germans used poison gases against the Allies fighting in the trenches on the Western Front. To protect soldiers from chemical warfare, gas masks were developed. Great Britain made one of the first types of masks capable of minimizing the deadly impact of these gases on their troops.
Though considered a novelty when the war began, aircraft were used by both sides for reconnaissance, allowing personnel to observe enemy troop positions, to direct artillery fire and to photograph enemy lines. By the end of the war, the concepts of aerial combat and aerial bombing had come into being.
https://history.delaware.gov/world-war-i/